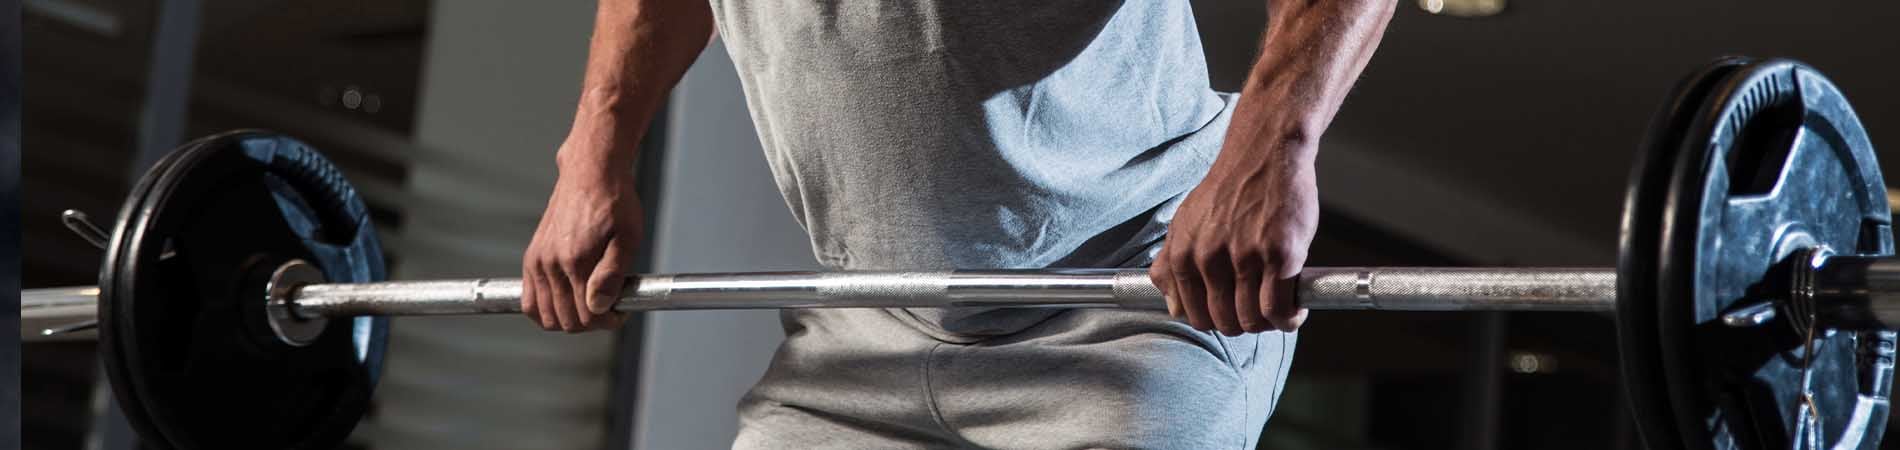
How to Do a Barbell Row (the Proper Way)
Key Takeaways
- The barbell row is a back-dominated exercise that, when done properly, can create impressive thickness and width.
- Proper form is crucial to avoid injuring the neck or back. Maintaining a neutral spine and focusing on a spot to keep your head positioned correctly will help with proper positioning.
- Common mistakes are lifting too heavy too soon, rounding the back, and pulling the weight with the arms rather than the elbows.
- Practicing with an empty bar or light dumbbells will ensure you maintain proper form once weights are added.
Back day already?
Looking in the mirror and not happy with what you see?

Want a back with thick muscles like Golden Era greats Samir Bannout, Franco Columbu, Serio Oliva, and Arnold Schwarzenegger? Many will agree that Samir’s back in the early 80s created the standard for back definition in the Mr. Olympia.
If you’re looking to build your back to get enviable width and thickness, the barbell row is a great foundational exercise. Including this exercise as part of your back day will help you get the definition needed to show off your physique.
Today, we discuss how to do the barbell row the proper way.
We’ll discuss:
- The muscles worked
- Proper form
- Mistakes to avoid
- Variations to use
Let’s get started with the muscles worked when completing the bent over barbell row.
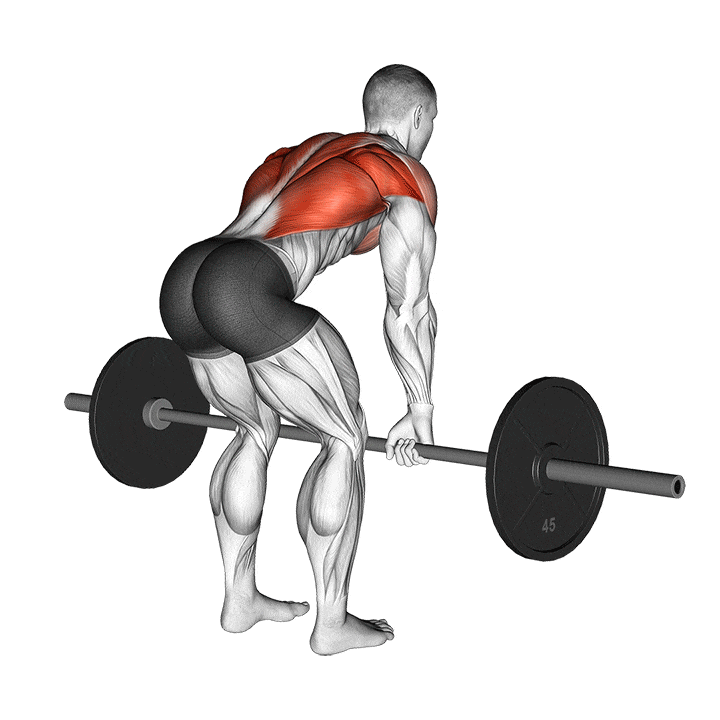
Barbell Row: Muscles Worked
The barbell row will work the entire back when done right. The core, biceps, and rear deltoids will be engaged during the movement, so will get some activation as well.
As a matter of fact, the American Council on Exercise did a study on what the best back exercise is.
They had 19 resistance-trained males between the ages of 18 and 25 perform these exercises:
- Lat pull-down
- Seated row
- Bent-over row
- Inverted row
- Pull-up
- Chin-up
- TRX row
- I-Y-T raises
Out of these back exercises, they picked the bent-over row as the winner. It activated three of the five targeted back muscles to the greatest degree and was second best for the other two.

The major muscles worked when completing the barbell row are the:
- Latissimus dorsi (lats)
- Traps (middle and lower)
- Rear deltoids
You’ll know you’re using proper form when performing the barbell row and you feel these muscles working when pulling the weight.
Now, let’s go over technique and form. We’ll run through the steps and then go back and discuss the most common mistakes to avoid.
How to do the Barbell Row: Proper Form
There are three phases you’ll go through when completing a rep of the barbell row:
- The Set Up
- The concentric row – the muscles shorten as the barbell comes up
- The eccentric row – the muscles lengthen as the barbell goes down
Performing each part of the row correctly will help build back thickness while avoiding injury. Concentric and eccentric movements are equally important when working out. Find out more here.
Let’s get into the proper form steps for completing the barbell row, then mistakes to avoid.
Getting Set Up
First, let’s talk about stance before we get into the row.
Foot Placement
You want your feet to be slightly wider than hip-width apart and no more than shoulder-width apart. Taller people may be more comfortable with their feet wider apart than shorter people. You can also rotate your feet out slightly if it’s a more comfortable position for you.

Also, pay attention to bar-to-foot placement. When you’re standing with your feet under the bar, the bar should fall about mid-foot. This is usually right around the ball of your foot or closer to the arch of your foot.
Some taller people or those with longer legs might find it easier with the bar closer to their shin. Your goal is to move the bar up and down in a straight line to generate the most power without hitting your knees.
Grip
There are two different ways you can grip the barbell when doing the bent-over row: underhand or overhand.
Place your hands on the bar with a narrow stance near your hips to target the lats and biceps more. Going wider with your grip to just past shoulder-width will activate the upper back more.

Be careful about going too wide, which can cause flaring of the elbows. Going too narrow can also stress the elbow and wrist joints.
If you’ve never done a barbell row before, try this out first with an empty bar. If the bar is too heavy, you can also try this with dumbbells. Practice form and function so you know which stance, grip style, and hand position works best for you.
Body Position
Now that you’ve got your feet and grip figured out, let’s talk about body position. If you’ve ever done a deadlift, then the form is similar.

It’s important to maintain a neutral spine with no rounding. In this video, Samir discusses rounding in the upper back when demonstrating the bent-over row. Check out the first exercise, where he discusses methodology and positioning with Mr Natural Olympia, John Hansen.
When just starting out with the barbell row, it’s best to stick with a neutral spine. Once you get more confident with the row, you can change your positioning. Doing it sooner could cause injury, especially in the back.
As mentioned earlier, your core will be engaged to help keep your torso stable and your back from rounding. You’ll take a big breath and hold it at the top then exhale at the bottom.
Shoulders should be down and back, squeezing them together as you bring the weight up. Squeeze your lats as you get into position and begin to lift the weight, then squeeze your shoulder blades after.
Your chest should be up and your gaze fixed on an object five or so feet in front of you. This keeps your chest and head in neutral position and resists the urge to look up or down when rowing.
Now that you’re in position, it’s time to row.
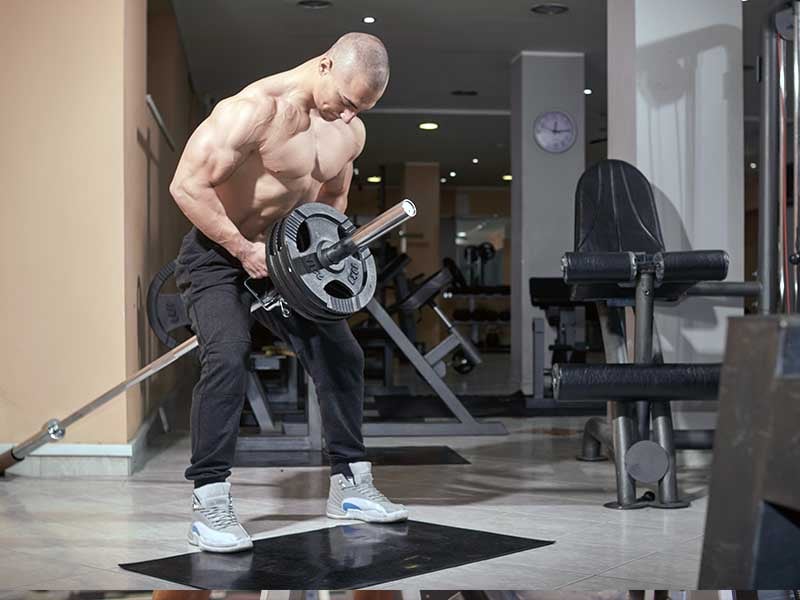
Bent-Over Barbell Row
- Get your body setup and positioned appropriately at the bar. Stand tall with your chest out and take a deep breath, filling your belly with air.
- Push your hips back with a slight bend to the knees. Bend over, maintaining a neutral spine, and place your hands on the bar with an overhand grip. Squeeze the bar as hard as you can to maintain a solid grip.
- Tuck your shoulder down and back, head in the neutral position with your eyes focused on your spot.
- Now it’s time for the concentric row. Extend your legs and hips upward to lift the weight off the floor. Use your elbows to pull the bar toward the ceiling.
- Continue to pull the bar straight up until it almost touches your torso. Depending on where you started with the bar, this could be between the belly button and bottom of the rib cage. As you lift, your legs should straighten, allowing the bar to pass your knees.
- Now you’re ready for the eccentric row. Keep your back neutral and core engaged. Quickly lower the bar back down to the ground until your arms are straight. Drop your hips so the weight reaches the ground.
- Reset and repeat until your reps are done and you’ve finished the set.
Complete 8 to 10 reps for two sets to start. Once you’ve got the form down, continue to three sets. Once you’re able to complete all three sets, you can add more weight.
Mistakes to Avoid
Proper form is key to completing any exercise correctly to avoid injury and get the most out of your workout. Avoiding these common mistakes will help ensure you’ll avoid injury and continue to progress.
1. Going too Heavy, too Fast
The best way to guarantee an injury with the barbell row is going too heavy, too fast. It’s always best to start with an empty bar before adding weights. Once you’re ready for weights, go with the lightest ones, then progress through the plates.

If you feel your shoulders internally rotate, then you’re lifting too heavy. They should be pulled back during the row, allowing you to squeeze your shoulder blades together at the top.
If we’ve learned anything from the Golden Era greats, it’s to never sacrifice form for showmanship. No one’s impressed with your heavy lifting if you can’t even use proper form. You’ll get laughed out of the gym, if you don’t get injured first.
2. Pulling Incorrectly
Using your elbows rather than your arms will make sure your back muscles are engaged during the row. After all, this is a back exercise, not an arm exercise. Save the arm workouts for arm day.
This is exactly why we urge you to start without any weights, so you can get a feel for the proper muscle engagement. Practice makes perfect form, always.
3. Rounding Your Body
Another great way to end up injured is by rounding your back or hyperextending your neck. Positioning is crucial, so make sure it’s right.

You want a neutral spine which can include a slight arch at the lower back like when you’re standing straight. Keep your gaze forward and locked to avoid looking down or up instinctively.
Your neck and back will thank you, and before you know it, your muscles will too.
4. Don’t Let Gravity do the Work
As the bar is descending into the eccentric row, avoid letting gravity pull the weight down. Instead, control the descent and reap the muscle hypertrophy benefits.
This goes for all exercise, no matter what muscle group you’re working. Staying in control of the weight at all times will force your muscles to work throughout each movement.
5. Knees Get in the Way
If your knees get in the way, you may need to change the bar-to-foot placement. Start out with the bar mid-foot to get the feel for placement during the row. Depending on limb length, this may need to be adjusted.
However, if you hit your knees, you should make adjustments. Make sure there is only a slight bend to your knees. Lift your hips up more, higher than with the deadlift or squat.
If you aren’t already, turn your toes out some to help push your knees out so they won’t be in the way.
Barbell Row Variations
One final mistake that people make is not adding variety to their rows. Once you’ve got the form down with the barbell or dumbbell row, it’s time to add in alternatives.
There are several rows you can add to your back day, here are a few to try:
- Pendlay rows: The torso is at a 90-degree angle and parallel to the floor.
- T-bar rows: Done with a machine or a landmine press using the barbell and weights on one end to perform the lift.
- Yates rows: The lifter will use an underhand grip in a more upright position.
- Machine rows: Can be done seated or standing using a seated machine or cable machine.
- Inverted rows: The lifter lies under a rack and uses their bodyweight to pull themselves up to the bar.
- Rack rows: Done the same way as the bent-over row, but performed in a power rack. Limits the range of motion and focuses on the concentric row.
- Seal Row: The lifter lies face down on a bench and uses dumbbells, kettlebells or a trap bar to row the weight.
Tips From The Coach

“I believe that the barbell row is the best exercise for developing thickness in the lats. Not only is it a great exercise for the back but it also affects so many other muscles including the biceps, the rear deltoids, the lower back, the hamstrings and the traps. It’s a real basic movement that is a great mass building exercise.
I like using a wider grip when doing barbell rows and pulling the bar into the upper abdominal area. With the wider grip, I feel the exercise in the outer upper lats which helps me build both width and thickness into the upper back.
The overhand grip puts more stress on the lats and less on the biceps. Wherever the elbows go is where you will feel the exercise in the back. If the elbows are going towards the waist, you will feel the movement in the lower lats. If the elbows go higher, you will feel the exercise in the middle lats.”
Wrapping Up
The barbell row is a functional exercise that, when done right, can create serious back definition and thickness. If you’ve ever seen the Christmas tree lats on Samir Bannout, the barbell row helped him achieve that musculature.
If you’ve never done a barbell row, start out with an empty bar or lightweight dumbbells. Perfect your form, then add weight. Use the variations to hit the muscle fibers differently for an exhaustingly satisfying back day.

Vintage Blast™ can help get you motivated to dominate your gym workouts. Increase your strength and endurance with this long-lasting, two-stage pre-workout formula.
Is the barbell row a part of your back day exercise routine? Do you have any variations to add to the list? We’d love it if you shared your routine with us in the comments below.